Archives for Basement Seepage

Moisture: The Root of all Maintenance

Moisture: The Root of all Maintenance

Moisture maintenance

One of the primary issues in building science is the study of how moisture damages buildings and reduces the quality of life of its inhabitants. Moisture penetration can cause mold, rot, and interior damage. Serious moisture problems and their cure are often hard to solve as the physics of air flow, dew points, and vapor transmission can be complicated even with invasive inspections and the introduction of modern tools such as infrared scanning and moisture meters. As these more difficult problems will need a longer article to fully explore, let us focus instead on the more common problems faced by homeowner association and condo boards.

Leaking Foundations

Foundations are usually constructed with poured concrete or concrete block. Modern foundations are protected with a waterproof coating on the exterior surface and a foundation drain around the foundation perimeter at the base of the footing, often with an under-slab drainage system with an associated sump pump. With these operating properly, basements should be dry. If a modern foundation (less than 30 years old) experiences water infiltration, something is not working right and the source is probably surface water. If someone tells you it is due to rising ground water, be skeptical. Keep in mind the water table is the depth in the earth that is permanently saturated with water. According to the building code, modern foundation basement slabs are built above the water table. If the water table is too high, then the building will not have a basement but rather it will be built on a slab on grade. If you have any question about where the water table is, the municipal code officer or a local foundation excavating contractor can help.

Two-Step Approach

If your foundation is leaking, you need a two-step action plan. First, fix the wall problem allowing water to infiltrate into the basement and second, minimize surface water reaching the exterior of your foundation wall. As it will prove difficult and expensive to re-apply waterproofing to the exterior wall, the typical repair is a pressure injection of polyurethane or other type of foam product into cracks in the wall. The second step is just as important.

Surface water comes from a variety of sources. It can be rain or snow melting on the roof, rain falling on the soil near the foundation, or water from nearby sloping land. Roof gutters are supposed to divert water away from the building, but often they are the primary source of water to the ground around the foundation. Gutters are often poorly designed – either they are undersized in handling the flow of water off the roof area, do not have enough downspouts to handle the quantity of run-off water, or the gutter/downspout is broken or incorrectly placed.

If gutters are installed too low at the roof edge, steep roofs will create a velocity in the laminar flow of water to overshoot the gutter during heavy rain events. Downspouts often discharge their water near the foundation rather than diverting it away from the wall. I recommend adding a minimum six-feet extension to the end of the downspout. Furthermore, you should treat the drip edge area along the foundation wall as a ‘secondary’ roof. By this I mean, you should seal the drip edge from allowing water from the roof or other source to enter the soil near the foundation.

Keep in mind the soil has been cultivated and it absorbs water readily. Newer homes also have the problem of the soil along the foundation being backfill soil that is not compacted well, allowing easy water passage, in effect creating a short circuit from the roof to your basement. This soft soil also is susceptible to settlement, creating a place for water to pool or cause erosion allowing even more water to enter the soil.

To prevent this problem, you must first create a positive slope on the surface away from the foundation. A good rule of thumb is to create a slope dropping three inches over six feet. Once the proper slope is in place, cover it with 6 mil poly plastic approximately 18 inches wide along the foundation perimeter. This is your “secondary’ roof preventing water from entering the soil. Cover this waterproof barrier with stone or other suitable material to prevent the poly sheet from moving.

You may also have to slope the land nearby to prevent your neighbor’s land from contributing to your surface water. This can be done with shallow surface ditches called swales or buried ditches called French drains. This type of drain is a trench at the foot of a slope shedding water toward your home designed to intercept surface water from reaching your foundation wall. Buried in the trench is a perforated pipe to divert water. Your landscaper or property manager can provide details on available options. With a logical plan, you can have the dry basement you deserve.

Read more

How to Hire a Condo Engineer: 4 Steps

How to Hire a Condo Engineer: 4 Steps

Hire condo engineerMake sure you actually need one, too

They don’t teach you how to hire an engineer in school. Indeed most folks have never had the occasion to hire an engineer or an architect in their whole life. This is also true for most condominium or HOA board members. So how does a condo board go about successfully hiring the right engineering firm for their upcoming project?

1. Evaluate the Need

Perhaps the first question to be asked is ‘do we even need an engineer?’ Not all projects do. Some repair projects are so straight forward and obvious the board can hire a contractor with the proper skills and run the project by a committee chair or a property manager who has expressed confidence she’s managed many similar repair projects. Some projects requiring some engineering expertise, such as replacing the common HVAC equipment or upgrading the common electrical systems, do not need an engineer to manage it but rather the right choice by the board would be to seek an HVAC or electrical contractor capable of providing ‘design/ build’ services for both a timely and economically satisfactory project.

The complexity of the project and criteria needed to be complied will determine whether an engineer is needed. Typical projects in this category will include designing a new storm water drainage system for the entire HOA; performing a reserve fund study; or evaluating and design of a new foundation for one or more buildings in the condo complex. It should be noted, the term ‘engineer’ in this article refers to a professional engineer (P.E.) licensed in the state of Maine. Though other unlicensed engineers can work on the project, only a licensed engineer can stamp (preliminary and final) construction documents for town planning board review; building permits; and other municipal requirements.

2. Selecting the Engineer

Once the need is determined, selecting an engineer is the next major step. The process starts with defining the project with a clear and complete description of the scope of work. Many property managers have the resources to provide considerable assistance to the board in developing this scope of work. While the scope of work is being prepared, a list of two or three engineering firm should be created. Clearly this list should be made up of engineering firms providing the services needed for the subject project. Here again the condo’s property manager can be a good source of finding the right firms. Similarly, engineers listed in the Condo Media’s directory can make this task relatively easy because the engineers listed will be firms with experience in not only the technical issues involved but also are familiar with the world of condominiums and their special needs.

3. Preparing the RFP

Once the potential list of firms is developed, a Request for Proposal (RFP) can be prepared. This document will utilized the defined scope of work to ensure all interested parties are preparing their responses with a similar understanding of the board’s objectives. Typical RFP’s have four major elements:

1) General Information for the Engineer
2) Technical Requirements
3) Criteria for Selection
4) Scope of Work Statement

On some projects it may necessary to invite the potential firms to visit the site for a tour to outline the issues or special conditions impossible to clearly delineate in the RFP. Following the distribution of the RFP to the listed firms, the board will screen the proposal responses; select firms it wishes to interview; and schedule the interviews (45 minutes to 1 hour) to allow both the engineering firm and the board to clarify any questions or concerns arising during the proposal preparation process.

4. The Interview and Contract Process

This interviewing process is most important. Typically, the principal or senior member of the engineering firm attends the interview giving the board a first-hand impression of the firm’s approach to this project; a clear commitment to the technical resources available for this project; and past relevant experience predicting a likely successful outcome. The interview also allows the engineering firm a better understanding of how the board will be making decisions and committing adequate representation to ensure proper administration of the project.

Following this interview the board should select it first choice for the project’s engineer. At that time the contract is negotiated. Often the contract is a direct reflection of the requirements of the RFP and the conditions and fee found in the engineering firm’s proposal. These negotiations on occasion will result in changes to the scope of work and the fee. If agreement cannot be reached on issues acceptable to the board, the board can begin discussions with their second engineering firm choice in order to feel comfortable with their selection. It is critical the board feels they have selected a firm they can work with and have confidence future communications and project outcome will meet their community’s needs.

Awarding the contract to the successful engineering firm is only the beginning. A kick-off meeting to introduce all of the project team members on both sides; a review of everyone’s obligations; and establish a clear line of authority and communications. In starting any major project, the board should always remember that just like dealing with a lawyer or a doctor, the engineer’s job is to provide competent technical information and solutions but it is the board’s responsibility to make the business’ decisions. History has shown a well- defined scope of work coupled with a board making timely decisions is a recipe for a successful project.

Article written by Jack Carr, P.E., R.S., LEED-AP, Criterium Engineers
Published in Condo Media January 2020 edition
Download a PDF Version of this Condo Media Article

Read more

Foundation Forensics

Crack in a foundationCracks in foundations are by far the most common structural complaint raised in either reserve fund studies or transition studies.   They can occur in the youngest or newest condo building. As condo documents usually assign the maintenance responsibility of their repair to the association, board members and property managers take them very seriously.  Missouri condo buildings have many types of foundations including concrete block; brick; and mortared stone with the most common being poured concrete.
Most basements and garages have 4 to 6 inch concrete slabs and unless this is a slab-on-grade foundation, the slabs were poured independently of the foundation walls.  They are said to be ‘floating’.  Often the construction joint between the slab and wall can easily be seen.  The common slab crack complaint is hairline cracks appearing in spider web-like patterns.  These cracks can show up shortly after construction and are normally caused by shrinkage during the curing process.  The key point here is this type of slab cracking is rarely a structural problem, for after all, the slab could be completely removed leaving a dirt floor while the foundation walls and columns with footings will easily maintain a stable building.

Therefore, slab cracking is often more of a cosmetic problem.  Cracks are often repaired with a variety of grout, caulk, or epoxy products primarily to prevent groundwater penetration, insect entry, or radon gas infiltration.  Cracks showing differential movement on opposing surfaces can be a tripping hazard but more importantly an indication of serious sub-surface conditions needing further investigation.

Regarding foundation walls, the most typical problem with concrete walls are vertical hairline cracks, often starting at the top of the wall and traveling down to the floor slab.  A sub-set of these types of cracks are those that propagate often in a diagonal direction from stress concentration points such as the bottom corners of basement window openings.  The key point to remember is these types of cracks, even when they penetrate the entire thickness of the wall, normally do not constitute a structural problem as the loads from above pass unobstructed on both sides of the crack to the footings below.

However, when the wall surfaces on both sides of the crack are moving out of plane or the structure above shows stress in the form of movement or cracking sheetrock walls and ceilings above, further structural evaluation is warranted.  Foundation cracks should be sealed if periodic water infiltration occurs.  Repairing cracks from the outside if often the best method, but due to the excavation costs involved, repairing the crack from the interior by injecting a crack filling material has become a routine solution.

When horizontal wall cracks; multiple closely spaced vertical cracks; or large diagonal cracks in basement corners are observed, these conditions may indicate more serious problems related to settlement or other structural problems.  Similarly, a single vertical crack that is much wider at the top of the wall may indicated foundation settlement problems stemming from poor soil conditions; hydrostatic groundwater pressures; or frost heaving.  These problems should be directed to a knowledgeable consultant.

Regarding concrete block foundation walls, most of the guidance above can be used with some exceptions.  By their nature concrete block walls are often not well reinforced and are subject to inward movement from various soil pressures causing these types of walls can bulge inward.  Ice lens forming about 3 feet below the ground surface can expand and push concrete block walls inward.  This can even occur from a vehicle’s weight being too close to the foundation, such as oil delivery truck.  When horizontal cracking is observed in block walls, steps should be taken quickly to prevent further movement.  These types of walls are also very susceptible to water penetration even when foundation drains are present often requiring serious water proofing repairs.

The key to maintaining a sound brick or concrete block foundation is periodic vigilance to ensure loose or dislocated masonry elements are not ignored.  If you observe a ‘stair step’ patten crack in the mortar joints of a masonry foundation wall, it typically means settlement has occurred under the ‘step’ section of the wall. .  Any observed bulges or horizontal movement, as well as new cracks, should be quickly addressed.

Many Missouri condominiums have been converted from old multi-family apartment buildings with mortared or un-mortared stone foundations, some with brick foundation walls above the ground surface.  These foundations have stood the test of time and are more than 100 years old and if well maintained can last another 100 years.  They are more likely to allow the entrance of ground water due to their porous nature and the necessary steps should be taken to protect the structural elements and indoor air quality of the building if high moisture is a problem.  Old foundations are like people.  As they age, they need some extra care but they have already met the test of time.

Read more

Water, Water, Everywhere

Typically when I am discussing water problems with the condo’s property manager or the board, the focus is on leaking roofs, foundations, windows, or other building envelope points of water infiltration.  Instead, this article’s focus will be on water damage problems from inside sources and their prevention.
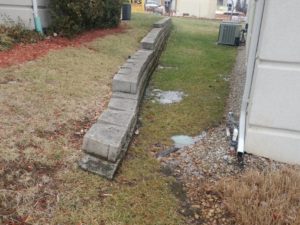
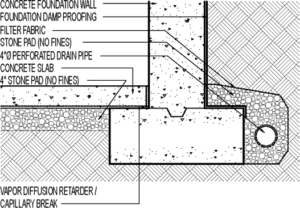
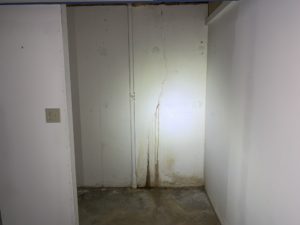
It is hard to talk about inside water damage without also considering a lengthy discussion of insurance matters, but I’ll try.  The short answer is both the board and the unit owner should confirm the correct policies are in place.  The association’s master insurance policy review should determine if the policy covers both as-built and upgrades (i.e. betterments and improvement clause) or just the walls, floors, and ceiling.  The unit owners should consider sewer/ drain back-up coverage, if the policy does not.  Keep in mind, insurance adjusters are looking for ways to avoid claim payouts.  They will look for the source of the water and whether it was caused by accidental reasons or old age wear and tear; lack of maintenance; or your negligence.

So why is internal water damage such a big deal?  It is because it is the number ONE insurance claim in the nation beating out other high profile claims including tornadoes, hurricanes, and wildfires.  And it is growing.  1 in 50 homes experienced an internal water claim in the five year period of 2013 to 2017 per Verish Analytics ISO who provides insurance industry statistical data.  This 5-year claim rate of 2.05% per dwelling is up from the prior 5-year statistical period rate of 1.44%.  This equates to an average $10,000 per claim and $13 billion in total claims for 2017.  It’s a big deal.

So why is this happening?  The short answer is the trends in condo and HOA development and the aging of residential building inventory across the country.  The burst in condo development in the 1980’s and 2000’s have resulted in many more water sourced appliances in risky locations.  Many homes built in the last 20 to 30 years have laundries on the second floor instead of the more traditional basement location where a leaking hose could be dealt with a mop and bucket.

Some homes can have more than 40 water connections including washing machines; water sourced heat pumps; ice makers; wet bars; filtration systems; extra bathrooms; dishwashers; garbage disposals; indirect hydronic floor heat; and the list goes on.  This partially explains why fire damage claims in the US have declined while water claims have increased, not only in numbers but in amount.  High-end properties are the worst for this increase in water claims.  For homes valued greater than $500,000 the claim sizes have doubled since 2015 while homes valued greater than $1 million have tripled in size according to the Wall Street Journal.

So what’s a property manager, board, or unit owner to do?  Protect the home.  Needless to say, each condo or HOA complex has its own factors of importance.  These factors must be considered and a plan should be established to minimize the potential problems each type of complex should address.  One place to start is the creation of a central maintenance log to record all reported internal water events to determine if there is a trend or pattern.  An aging condo may have experienced a rash of washing machine hose leaks.  This may prompt the property manage to notify unit owners to inspect their own hoses for wear or even hire a plumber to inspect all of the units’ water sourced appliances.  Another HOA may have a population of ‘snow birds’ who should be cautioned to maintain their unit thermostats at a certain level to avoid pipe freeze up while they are vacationing in warmer climates.  Sometimes a global reminder to all unit owners of the location of their central water shut off valve for future water emergencies is a good ounce of prevention.

Needless to say, no matter how much a property manager or board thinks about internal water damage, it often comes down to the individual unit owner being responsible to maintain the unit.  Investing in water sensors at some risky or perennial problem locations may be money well spent.  Educating the unit owners through the association’s newsletter or web site is also a step in the right direction.  Reminders of the importance of maintaining caulk in the tubs and showers; hose connections for all appliances; and periodic observations around the home looking for developing rust; drywall damage; and pooling water can go a long way in preventing a trickle becoming a sea of trouble.

~~~~~~~~~~~~~~~~~~~~~~~~~~~~~~~~

Article written by Jack Carr, P.E., R.S., LEED-AP, Criterium Engineers

Published in Condo Media May 2019 edition

Download a PDF copy of this Condo Media Article

Read more

Basement Waterproofing – How do you keep water out of a basement?

Maintain proper drainage

Basement Waterproofing - How Do You Keep Water Out of a Basement

A cost effective approach to basement waterproofing is to maintain with perimeter surface drainage conditions.  The importance of proper drainage and landscaping (mature trees) around a foundation cannot be over emphasized.  Poor drainage around the foundation is the most common cause of foundation problems and basement moisture problems.  Drainage and moisture control around the home include proper ground slopes away from the foundation.  It also includes keeping your gutters clean and the downspouts functional.  Not doing so, allows the water from the roof to overflow the gutters.  This water then runs along the foundation and in turn can cause basement seepage or foundation movement.

New Construction Basement Waterproofing

In new construction, cast-in-place concrete foundations are more resistant to water penetration than concrete block. Bituminous waterproofing should be used, at a minimum, to seal the outside of any foundation wall, however. An effective perimeter drain system should be installed to collect water from around the foundation and under the slab.

The National Association of Home Builder’s booklet on dry basements entitled, “Basement Water Leakage – Causes, Prevention, and Correction,” recommends perimeter drains on the inside and outside of the foundation. These drains should either flow downward to a gravity outlet (natural drainage) or to a sump where the water can be discharged with a sump pump.

A building built in a wet site should take advantage of additional waterproofing; a membrane system. One example of a membrane system consists of multiple layers of impervious material applied in a hot tar mopped system to the outside of the foundation. Special attention should be paid to the joint between the wall and the footing. The concrete floor and walls (whether block or concrete) should be reinforced to minimize cracking.

Existing Construction Basement Waterproofing

A water problem in an existing basement can only effectively be dealt with by:

  • rewaterproofing the outside of the foundation walls and/or
  • upgrading the exterior foundation drainage system

Both approaches require excavation around the outside of the foundation.

There are alternatives which will intercept the water using a channel-like system around the interior of the foundation wall to collect and guide the water into a sump and discharge it using a sump pump. These systems do not correct the water problem but they do control the water once it has entered the basement in a way that minimizes problems related to water entry. Such systems, while dealing more with the symptom than the cause, are typically less expensive because they can be accomplished from the inside.

Ultimately, when dealing with a basement water problem, the tried and true conventional methods working from the outside are still the most reliable.

Basement waterproofing and existing building, or rewaterproofing, the outside of a basement wall requires excavation to the full depth of the wall, careful cleaning of the wall surface and proper application of bituminous waterproofing. A multi-layered membrane system should be used if the surrounding water conditions are severe. At the same time, a perimeter drain system should be installed, similar to the recommendations noted above for a new foundation. If there are cracks in a wall, the cracks should be chipped out to form a V-groove along the length of the crack approximately one inch deep. The V-groove should then be sealed with a good quality epoxy or silicone caulking, filled with mortar and covered with bituminous waterproofing.

Epoxy injection

An effective, but sometimes expensive alternative, is epoxy injection into the crack. This can be done from the inside. The epoxy bonds with the concrete and creates a somewhat permanent seal against water penetration. The limitations to this system are cost and effectiveness, depending on the size of the crack. The smaller the crack, the less likely it is that full penetration injection is possible. However, before undertaking expensive excavation around the outside of a foundation, you may want to get proposals from local epoxy companies to compare the cost and potential effectiveness.

Basement water is controllable but there is no easy answer. Only the more complex and sometimes expensive approaches are truly reliable.

Peaceful Coexistence

Peaceful coexistence is sometimes an appropriate resolution to a basement water problem. While keeping water out of a basement may seem ideal, there are risks. Preventing water from entering an older stone or concrete block foundation can cause water to accumulate on the outside of the foundation walls increasing water pressure on the walls themselves. The result can and has been total failure of the foundation wall. Where the construction of the foundation wall is marginal or questionable, the better approach to water control is to permit the water to enter, collect it into an interior drainage system, guide it to a sump and pump it away.

Check out our Residential Services to learn more about how we can help!

Read more