Archives for Maintenance

Vinyl Siding – or Not

Vinyl Siding ProblemsPerhaps you are on the Building Committee which has been charged by the Board to recommend a replacement siding material for your 35 year old condo. Perhaps you are a property manager whose in-basket is filled with unit owner complaints about vinyl clapboard siding problems in the new condo complex. Whatever the vinyl façade issue is, the future solutions may surprise you.

Vinyl siding materials are everywhere. It is probably the most common façade material in all its forms used on condominiums across the nation, and for good reason. It is quick to install; it is relatively inexpensive; and has an estimated useful life of over 40 years. Most of its negatives are well understood: it can crack or break in the winter time from hail or your grandkids hockey pucks; it can make noise when it’s windy or too hot; colors fade or become chalky over time; and frequent cleaning is required. However, these may not be the issues you may need to face with the current vinyl siding problems.

Solar Attack

This problem can fall in the unintended consequences category. With the issuance of the new building energy codes and the drive to reduce our heating costs and carbon footprint, we are melting our vinyl siding. This is happening due to the installation of the new low-E, highly insulated glass windows being installed in both new buildings and replacement windows.

The thermal layers and reflective properties of these high-tech windows cause sun rays to bounce off and reflect onto vinyl siding causing the siding to buckle; warp; or melt. These new window surfaces act like magnifying glasses concentrating the solar energy on a vinyl surface that cannot tolerate heat over 150 degrees Fahrenheit. This condition can occur when a window on the south elevation of the building is near a right angle corner wall covered in vinyl siding. It can even occur when a new commercial building is built across the street and its new glass wall façade faces the sun and reflects across the street to your vinyl sided property.

So what are you to do? This problem was rare in the past but now solar damage is occurring with increasing frequency due to the drive to install low-E windows. The Vinyl Siding Institute suggests placing awning or shades over the windows and even changing the landscaping to create shade trees to block the light. Some vinyl siding manufacturers are addressing this type of solar damage by adding a ‘thermal diffusion agent’ to the vinyl mix at the factory to help reflect and resist the heat build-up.

Manufacturers are also responding to the problem with vinyl siding by excluding solar refection or melt damage from their warranties. Their warranties always excluded damage from heat sources such as gas grills placed too close to the exterior wall, but now damage from reflective windows is recognized so it would be wise to read the fine print before selecting a siding brand.

Color Fading

This increasing problem is a sub-set of the solar melting problem. Whether it be due to window reflective energy; climate change; or changes in manufacturing, this color fading complaint is becoming more prevalent. In the past, color fade was protected with a lifetime warranty by the manufacturer. Color fade was measured by a maximum of a Delta E of 4 Hunter units in accordance with ASTM standard D2244.

In the past, this warranty issue would be handled by a siding replacement policy. Now, some manufacturers are offering a ‘restore’ process instead of replacement. The ‘restore’ process would allow the manufacturer to paint the siding with an acrylic paint often applied by specialist painting contractors. This restore process comes with a 10-year warranty, down from the prior ‘limited-lifetime’ color warranty. Here again, read the fine print before signing the contract.

Installation

Vinyl siding may be quick to install, but it is not easy, if it is done right. Vinyl siding has an integral vinyl tab at the top in which an oval hole is punched at set intervals along its length to allow a nail to be driven through this hole and into the sheathing. Sounds simple, but it is not. The manufacturer specification requires the installer to drive the nail head within 1/32th of the vapor barrier/ sheathing surface so as not to bind the thermal movement of the siding.

Keep in mind the fasteners are being driven by an adjustable nail gun requiring a level of skill to properly set the nails in each slot hole without touching the vinyl. This accuracy requirement, coupled with today’s reduced numbers of skilled construction personnel, makes this a quality control challenge. If fastener binding does occur, the siding will not properly move with thermal expansion and buckling will soon appear on the surface.

So the answer to today’s vinyl siding problem is: do your research. Read the manufacturer’s specifications and warranties; ensure your contractor is committed to good supervision of the installation of this important building envelope element; and finally, follow up with your own quality verification program, either through your building committee or project engineer. The siding is only as good as it is installed.

Read more

Foundation Forensics

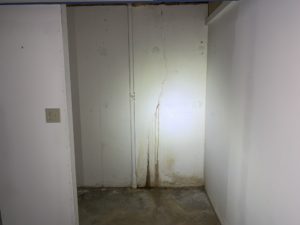
Crack in a foundationCracks in foundations are by far the most common structural complaint raised in either reserve fund studies or transition studies.   They can occur in the youngest or newest condo building. As condo documents usually assign the maintenance responsibility of their repair to the association, board members and property managers take them very seriously.  Missouri condo buildings have many types of foundations including concrete block; brick; and mortared stone with the most common being poured concrete.

Most basements and garages have 4 to 6 inch concrete slabs and unless this is a slab-on-grade foundation, the slabs were poured independently of the foundation walls.  They are said to be ‘floating’.  Often the construction joint between the slab and wall can easily be seen.  The common slab crack complaint is hairline cracks appearing in spider web-like patterns.  These cracks can show up shortly after construction and are normally caused by shrinkage during the curing process.  The key point here is this type of slab cracking is rarely a structural problem, for after all, the slab could be completely removed leaving a dirt floor while the foundation walls and columns with footings will easily maintain a stable building.

Therefore, slab cracking is often more of a cosmetic problem.  Cracks are often repaired with a variety of grout, caulk, or epoxy products primarily to prevent groundwater penetration, insect entry, or radon gas infiltration.  Cracks showing differential movement on opposing surfaces can be a tripping hazard but more importantly an indication of serious sub-surface conditions needing further investigation.

Regarding foundation walls, the most typical problem with concrete walls are vertical hairline cracks, often starting at the top of the wall and traveling down to the floor slab.  A sub-set of these types of cracks are those that propagate often in a diagonal direction from stress concentration points such as the bottom corners of basement window openings.  The key point to remember is these types of cracks, even when they penetrate the entire thickness of the wall, normally do not constitute a structural problem as the loads from above pass unobstructed on both sides of the crack to the footings below.

However, when the wall surfaces on both sides of the crack are moving out of plane or the structure above shows stress in the form of movement or cracking sheetrock walls and ceilings above, further structural evaluation is warranted.  Foundation cracks should be sealed if periodic water infiltration occurs.  Repairing cracks from the outside if often the best method, but due to the excavation costs involved, repairing the crack from the interior by injecting a crack filling material has become a routine solution.

When horizontal wall cracks; multiple closely spaced vertical cracks; or large diagonal cracks in basement corners are observed, these conditions may indicate more serious problems related to settlement or other structural problems.  Similarly, a single vertical crack that is much wider at the top of the wall may indicated foundation settlement problems stemming from poor soil conditions; hydrostatic groundwater pressures; or frost heaving.  These problems should be directed to a knowledgeable consultant.

Regarding concrete block foundation walls, most of the guidance above can be used with some exceptions.  By their nature concrete block walls are often not well reinforced and are subject to inward movement from various soil pressures causing these types of walls can bulge inward.  Ice lens forming about 3 feet below the ground surface can expand and push concrete block walls inward.  This can even occur from a vehicle’s weight being too close to the foundation, such as oil delivery truck.  When horizontal cracking is observed in block walls, steps should be taken quickly to prevent further movement.  These types of walls are also very susceptible to water penetration even when foundation drains are present often requiring serious water proofing repairs.

The key to maintaining a sound brick or concrete block foundation is periodic vigilance to ensure loose or dislocated masonry elements are not ignored.  If you observe a ‘stair step’ patten crack in the mortar joints of a masonry foundation wall, it typically means settlement has occurred under the ‘step’ section of the wall. .  Any observed bulges or horizontal movement, as well as new cracks, should be quickly addressed.

Many Missouri condominiums have been converted from old multi-family apartment buildings with mortared or un-mortared stone foundations, some with brick foundation walls above the ground surface.  These foundations have stood the test of time and are more than 100 years old and if well maintained can last another 100 years.  They are more likely to allow the entrance of ground water due to their porous nature and the necessary steps should be taken to protect the structural elements and indoor air quality of the building if high moisture is a problem.  Old foundations are like people.  As they age, they need some extra care but they have already met the test of time.

Read more

HOA Fees Going Up?

How to Sell the Results of a Reserve Study Without a Revolt

While the importance of associations building a strong reserve fund is no mystery to you, raising fees or assessments is often a sensitive subject with homeowners. Every association needs a long-term planning goal, and a reserve study creates an accurate timetable for all major improvements. Learn how to address those sensitivities and sell the results of a reserve study with a revolt.

FIDUCIARY DUTY

One of the primary business duties of community associations is maintaining and preserving property values of the associations’ common property. To do this properly, associations must develop funding plans for future repair or replacement of major common-area components.

A reserve study is a budget-planning tool that identifies the current status of the reserve fund and establishes a stable and equitable funding plan to offset the anticipated future major common-area expenditures. Being prepared for non-annual expenses allows your association to change the unexpected to the expected. Reserve studies are one of the best strategies for financial and physical health at the association’s disposal. In order to keep the replacement costs current, the reserve study should be updated (with a site visit) every three to four years.

COMMUNICATION AND RELATIONSHIPS

It is our belief that fundamental to the accomplishment of any of these objectives is two basic premises: communication and relationships. Communication is multi-faceted – between the board and the owners, between the board (and/or subcommittee) and the consultant, and between the consultant and the owners. To ignore these opportunities for effective communication will result in diluting the effectiveness and ultimate success of the implementation of any reserve study on the books for your association.

Relationship nurtures trust and confidence. Through effective communication, greater trust and confidence can be developed between the various parties involved. As a result, it is more likely (although certainly not guaranteed) that the recommendations of a reserve fund study can be effectively implemented.

AN OUTLINE FOR SUCCESS

It is imperative that the scope of a reserve study be clearly defined before even seeking proposals from consultants. The following are a variety of options to be included in the scope of any Request for Proposals:

  • Define the project – From the table above, define exactly what is expected of the consultant. This should be as a result of discussion by the board and/or building subcommittee to determine what is needed. It is particularly important to decide whether the reserve study is to be based on simply replacing existing components or if upgrades and improvements should be considered.
  • Interview the consultant – The RFP should include a paragraph such as follows below. Getting to know the consultant, the people involved on your project and their approach to the project is imperative to a successful relationship.
    The board will select two to three consultants it believes to be qualified for the work and then conduct interviews. The objective of the interview is to meet the people who will be specifically working on our project, discuss a variety of questions, and generally understand the procedures the consultant intends to use for the project. A final choice will be made within one week following the interviews.
    A reserve provider’s objectives are threefold: to provide a broader perspective on reserve studies; to assist property managers with a successful presentation of reserve fund studies; and to create opportunities for more meaningful reserve studies and effective implementation of recommendations.
  • Pre-project meeting – The board (or building subcommittee) should meet with the consultant before actual work starts. The objective is to refine and finalize the scope of the project. This is also an opportunity to determine what will be expected of the association (or management company) and what will be expected of the consultant throughout the project. Suggested language for the RFP is as follows:
    The first step after selection is a meeting with the board (building subcommittee) to review, refine, and finalize the scope of this project. At that time, the items to be covered, the procedures involved, the on-site protocol to be used by the consultant, and any special concerns of the board (building subcommittee) will be discussed.
  • Conduct an owner survey – The intent is to give all of the owners the opportunity to express any particular concerns they might have about the project. While this may seem risky, it has been our experience that it is actually quite effective. Such a survey would be accompanied by a letter from the association providing all of the owners with the scope and limitations of the reserve study to be conducted and encouraging them to respond to the survey. It has been our experience that there is a very high percentage of response. Often the response to these surveys will reveal patterns that relate to association responsibilities as well as giving owners the opportunity to note areas of concern. The following is text for the RFP relative to this point:
    The consultant is expected to participate in at least one meeting with the board (building subcommittee) prior to commencement of the project.
    The consultant is expected to distribute a survey for use by all unit owners and compile the results of that survey as a part of the reserve fund study.
    The content of the survey should be reviewed and modified for each specific project. Also, a letter should be distributed to the unit owners, along with the survey, explaining the purpose and logistics of the reserve study and the survey. That letter should be on the association stationery. The survey would be on the consultant’s stationery.
    The final report would include a summary of the survey findings as well as any specific recommendations or observations related to the survey.
  • Follow-up meetings – It is important that the consultant be willing to discuss the findings of the study with the directors, building subcommittee, and unit owners. This is especially important if the study includes an evaluation of upgrades and improvements. Ideally, there will have been ongoing communication with the directors (building subcommittee) throughout the study process. A meeting with the unit owners will be a logical extension of that process. The following is language to be used in an RFP for that purpose:
    The consultant is expected to attend at least one meeting to which all of the unit owners are invited. This will occur after submittal and acceptance of the final report. The consultant will be expected to provide an overview of their findings and to respond to questions from the unit owners.
  • Report format – Effective communication means effective distribution of information. In larger associations (more than thirty to fifty unit owners), distributing the complete report is impractical, cumbersome, and usually unnecessary. However, a condensed “owners’ report” is a valuable tool to distribute information. Typically, the owners’ report would include an executive summary and the financial projections that are part of the master report. To achieve this purpose, the following language is suggested for the RFP:
    The consultant will provide (enough for the board or building subcommittee) copies of the complete final report. This will include photographs highlighting areas of concern and/or special interest. In addition, the consultant will provide a single reproducible copy of an owners’ report which will include a brief (two to three pages) overview of the findings of the study and the reserve fund projections.
  • Review draft report – For the association, directors, and building subcommittee to be comfortable with the work of the consultant, it is important that there be interaction throughout the process. Generally, we recommend that the consultants meet with the directors/building subcommittee regularly throughout the process of developing the study and submit a draft report for review and comment by the directors/building subcommittee. Recommended RFP language is as follows:
    The consultant will provide a draft report for review by the board (building subcommittee). The board (building subcommittee) will provide comments within two weeks of receipt of the draft report. Following that, the consultant will provide its final report.

Now That You Have the Results, Where Do You Go From Here?

In the first half of this article, we discussed reserve studies and selling the results of the report to your association (without a revolt!). Now that you have the association on board with the report, how do you go about implementing the actual findings?

Click here to download the full article and a complete look at next steps…


Note: these resources are provided for consumer guidance only. To have a licensed, Professional Engineer inspect your deck, contact Criterium-Hardy Engineers.

Read more

How Safe Is Your Deck?

May is National Deck Safety Month® and your spring maintenance checklist should include a thorough inspection of your deck and railings. It’s important to ensure their safety before the outdoor entertainment season begins with family gatherings and neighborhood barbecues taking place on your deck.

Here are a few items to consider as you check your deck:

  • Check Connections: make sure all railing connections are secure. Anchorage points for wood railings often rot and may fail. Perform a stress test by cautiously pushing on the railing to make sure it doesn’t give at any point.
  • Stair Railings: stairs with two or more stair risers should have a railing.
  • Guardrails (railings): are required on “open-sided walking surfaces” higher than 30 inches from the ground, including decks. On single family homes, guardrails must be 36 inches high for decks (measured from the deck surface to the top of the rail) and 34 inches for stairs, measured vertically from the tread nosing.
  • Strength & Spacing: both guardrails and handrails must be able to withstand at least 200 pounds of force applied at any point and in any direction. The balusters should withstand 50 pounds of pressure exerted over a one-square-foot area. Spaces between balusters cannot exceed 4 inches to prevent children from getting their heads stuck in the openings or falling through them.
  • Benches: a bench installed around the perimeter does not serve also as a guardrail. The bench may be the required distance from the ground (36 inches), but without a guardrail behind it, which both the building code and common sense require, there is nothing to prevent someone from toppling backwards off the deck.
  • Touchup with Paint: repaint or stain the wood, if necessary (the experts suggest at least every five years). Consider using paint with slip-resistant additives for the deck and stairway riser surfaces.

With regular inspections of handrails and guardrails, you can identify and correct problems before they become an accident you could have prevented. Ensuring that your deck, handrails and guardrails are safe will help to ensure the safety of all who use them from toddlers to seniors.

Related Resources:

  • Your Home – a Criterium Engineers publication “Stairways and Decks Aren’t Safe Unless their Railings are Secure.” This document outlines building code requirements for guardrails and handrails, as well as design elements that may cause problems such as rail height and benches along the perimeter.
  • The State of California has a new extensive law that went into effect January 1, 2019, requiring the inspection of Exterior Elevated Elements (Decks and Balconies) and waterproofing elements for buildings with 3 or more multifamily dwelling units. Information on this bill and its history may be found on CA.gov.
  • The North American Deck and Railing Association (NADRA) provides tools for consumers to Check Your Deck® for the upcoming season.

Note: these resources are provided for consumer guidance only. To have a licensed, Professional Engineer inspect your deck, contact Criterium-Hardy Engineers.

Read more

Water, Water, Everywhere

Typically when I am discussing water problems with the condo’s property manager or the board, the focus is on leaking roofs, foundations, windows, or other building envelope points of water infiltration.  Instead, this article’s focus will be on water damage problems from inside sources and their prevention.

It is hard to talk about inside water damage without also considering a lengthy discussion of insurance matters, but I’ll try.  The short answer is both the board and the unit owner should confirm the correct policies are in place.  The association’s master insurance policy review should determine if the policy covers both as-built and upgrades (i.e. betterments and improvement clause) or just the walls, floors, and ceiling.  The unit owners should consider sewer/ drain back-up coverage, if the policy does not.  Keep in mind, insurance adjusters are looking for ways to avoid claim payouts.  They will look for the source of the water and whether it was caused by accidental reasons or old age wear and tear; lack of maintenance; or your negligence.

So why is internal water damage such a big deal?  It is because it is the number ONE insurance claim in the nation beating out other high profile claims including tornadoes, hurricanes, and wildfires.  And it is growing.  1 in 50 homes experienced an internal water claim in the five year period of 2013 to 2017 per Verish Analytics ISO who provides insurance industry statistical data.  This 5-year claim rate of 2.05% per dwelling is up from the prior 5-year statistical period rate of 1.44%.  This equates to an average $10,000 per claim and $13 billion in total claims for 2017.  It’s a big deal.

So why is this happening?  The short answer is the trends in condo and HOA development and the aging of residential building inventory across the country.  The burst in condo development in the 1980’s and 2000’s have resulted in many more water sourced appliances in risky locations.  Many homes built in the last 20 to 30 years have laundries on the second floor instead of the more traditional basement location where a leaking hose could be dealt with a mop and bucket.

Some homes can have more than 40 water connections including washing machines; water sourced heat pumps; ice makers; wet bars; filtration systems; extra bathrooms; dishwashers; garbage disposals; indirect hydronic floor heat; and the list goes on.  This partially explains why fire damage claims in the US have declined while water claims have increased, not only in numbers but in amount.  High-end properties are the worst for this increase in water claims.  For homes valued greater than $500,000 the claim sizes have doubled since 2015 while homes valued greater than $1 million have tripled in size according to the Wall Street Journal.

So what’s a property manager, board, or unit owner to do?  Protect the home.  Needless to say, each condo or HOA complex has its own factors of importance.  These factors must be considered and a plan should be established to minimize the potential problems each type of complex should address.  One place to start is the creation of a central maintenance log to record all reported internal water events to determine if there is a trend or pattern.  An aging condo may have experienced a rash of washing machine hose leaks.  This may prompt the property manage to notify unit owners to inspect their own hoses for wear or even hire a plumber to inspect all of the units’ water sourced appliances.  Another HOA may have a population of ‘snow birds’ who should be cautioned to maintain their unit thermostats at a certain level to avoid pipe freeze up while they are vacationing in warmer climates.  Sometimes a global reminder to all unit owners of the location of their central water shut off valve for future water emergencies is a good ounce of prevention.

Needless to say, no matter how much a property manager or board thinks about internal water damage, it often comes down to the individual unit owner being responsible to maintain the unit.  Investing in water sensors at some risky or perennial problem locations may be money well spent.  Educating the unit owners through the association’s newsletter or web site is also a step in the right direction.  Reminders of the importance of maintaining caulk in the tubs and showers; hose connections for all appliances; and periodic observations around the home looking for developing rust; drywall damage; and pooling water can go a long way in preventing a trickle becoming a sea of trouble.

~~~~~~~~~~~~~~~~~~~~~~~~~~~~~~~~

Article written by Jack Carr, P.E., R.S., LEED-AP, Criterium Engineers

Published in Condo Media May 2019 edition

Download a PDF copy of this Condo Media Article

Read more

Basement Waterproofing – How do you keep water out of a basement?

Maintain proper drainage
Basement Waterproofing - How Do You Keep Water Out of a Basement

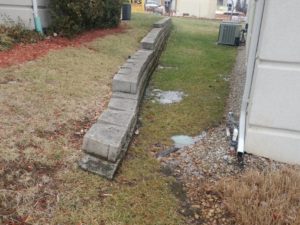
A cost effective approach to basement waterproofing is to maintain with perimeter surface drainage conditions.  The importance of proper drainage and landscaping (mature trees) around a foundation cannot be over emphasized.  Poor drainage around the foundation is the most common cause of foundation problems and basement moisture problems.  Drainage and moisture control around the home include proper ground slopes away from the foundation.  It also includes keeping your gutters clean and the downspouts functional.  Not doing so, allows the water from the roof to overflow the gutters.  This water then runs along the foundation and in turn can cause basement seepage or foundation movement.

New Construction Basement Waterproofing

In new construction, cast-in-place concrete foundations are more resistant to water penetration than concrete block. Bituminous waterproofing should be used, at a minimum, to seal the outside of any foundation wall, however. An effective perimeter drain system should be installed to collect water from around the foundation and under the slab.
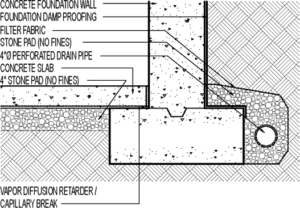
The National Association of Home Builder’s booklet on dry basements entitled, “Basement Water Leakage – Causes, Prevention, and Correction,” recommends perimeter drains on the inside and outside of the foundation. These drains should either flow downward to a gravity outlet (natural drainage) or to a sump where the water can be discharged with a sump pump.

A building built in a wet site should take advantage of additional waterproofing; a membrane system. One example of a membrane system consists of multiple layers of impervious material applied in a hot tar mopped system to the outside of the foundation. Special attention should be paid to the joint between the wall and the footing. The concrete floor and walls (whether block or concrete) should be reinforced to minimize cracking.

Existing Construction Basement Waterproofing

A water problem in an existing basement can only effectively be dealt with by:

  • rewaterproofing the outside of the foundation walls and/or
  • upgrading the exterior foundation drainage system

Both approaches require excavation around the outside of the foundation.

There are alternatives which will intercept the water using a channel-like system around the interior of the foundation wall to collect and guide the water into a sump and discharge it using a sump pump. These systems do not correct the water problem but they do control the water once it has entered the basement in a way that minimizes problems related to water entry. Such systems, while dealing more with the symptom than the cause, are typically less expensive because they can be accomplished from the inside.

Ultimately, when dealing with a basement water problem, the tried and true conventional methods working from the outside are still the most reliable.

Basement waterproofing and existing building, or rewaterproofing, the outside of a basement wall requires excavation to the full depth of the wall, careful cleaning of the wall surface and proper application of bituminous waterproofing. A multi-layered membrane system should be used if the surrounding water conditions are severe. At the same time, a perimeter drain system should be installed, similar to the recommendations noted above for a new foundation. If there are cracks in a wall, the cracks should be chipped out to form a V-groove along the length of the crack approximately one inch deep. The V-groove should then be sealed with a good quality epoxy or silicone caulking, filled with mortar and covered with bituminous waterproofing.

Epoxy injection

An effective, but sometimes expensive alternative, is epoxy injection into the crack. This can be done from the inside. The epoxy bonds with the concrete and creates a somewhat permanent seal against water penetration. The limitations to this system are cost and effectiveness, depending on the size of the crack. The smaller the crack, the less likely it is that full penetration injection is possible. However, before undertaking expensive excavation around the outside of a foundation, you may want to get proposals from local epoxy companies to compare the cost and potential effectiveness.

Basement water is controllable but there is no easy answer. Only the more complex and sometimes expensive approaches are truly reliable.

Peaceful Coexistence

Peaceful coexistence is sometimes an appropriate resolution to a basement water problem. While keeping water out of a basement may seem ideal, there are risks. Preventing water from entering an older stone or concrete block foundation can cause water to accumulate on the outside of the foundation walls increasing water pressure on the walls themselves. The result can and has been total failure of the foundation wall. Where the construction of the foundation wall is marginal or questionable, the better approach to water control is to permit the water to enter, collect it into an interior drainage system, guide it to a sump and pump it away.

Check out our Residential Services to learn more about how we can help!

Read more

Hidden Dangers of Dryer Vents

Who would think venting a unit’s clothes dryer was so complicated?  When was the last time the cleanliness of dryer vents was on your Board’s meeting agenda?  Yet, clothes dryers may be one of the most dangerous appliances in the home.  The U.S. Consumer Product Safety Commission reports there are more than 15,000 home fires each year directly related to dryer maintenance and overheating with blocked exhaust venting contributing to half of those fires.  Dryer venting falls in the category of what you can’t see, can hurt you.


Just as condo units and their buildings come in many shapes and sizes, so does dryer vent systems.  It is not unusual for new Boards not only not understand the exact nature of their condo’s in-unit dryer vent system but they also are not certain who is responsible for its maintenance.  Most dryer vent ducts pass through common space, except for HOA unit owners who are responsible for their own building envelope and everything within.  Some condo dryer vent ducts are dedicated to a given unit while others are shared with other units.  Many dryers vent pass through an exterior wall while mid-rise and high-rise condo buildings share a vertical rooftop vent system.

With these different types of systems and variances often found in the governing condo documents, it is not always well understood by the Board members who is responsible for maintenance and repair of dryer duct systems.  This includes basic routine cleaning even if it is clear maintaining the in-unit dryer is part of the unit owner’s responsibility.  This is an important issue to resolve with the assistance of your legal counsel, as it is the first step in meeting the Board’s responsibility to oversee the safety of the units’ venting system and its occupants.

Once dryer vent system maintenance responsibilities are understood, a policy should be put in place.  This policy should provide authority for unit access and performing maintenance and repairs when owners fail to comply with the dryer policy including assessing charges to the unit owner incurred by the association in providing the required dryer maintenance.  The policy should specify the required maintenance including cleaning of the dryer vents and ducts on a scheduled basis, typically every two years.  Often communities will engage a dryer maintenance contractor at a bulk rate to provide a cost effective and consistent maintenance program.  Should a unit owner opt out of this service they would be required to provide proof of compliance of the required maintenance being conducted by others.

Before the dryer maintenance program can be implemented, the Board must understand their system.  This may require the assistance of a maintenance repair contractor or the association’s building engineer who will need to inspect the present system.  This inspection may reveal common and shared duct systems; long duct runs with booster in-line fans; improper duct materials.  As an example, any vent duct found to be vinyl, PVC, or flexible is a problem.  Most of these types of vent ducts are violations of the local and national building codes, as their interior surfaces collect lint creating a build up of highly flammable material as well as a medium to collect water whose weight can bend duct pipe and create an environment susceptible to mildew and mold.  Improper duct should be removed and replaced with smooth-walled metal ductwork.  If flexible duct is found forming an elbow at the rear of the dryer, it should be replaced with non-flexible metal elbow duct so as not to be crushed when the dryer is pushed against the wall.

The policy may set specifications on the type of dryers to be allowed in units.  Not all dryers are the same.  Beyond the differences between electric and gas-fired dryers, some dryers have significantly different exhaust characteristics.  Building codes recognizes this by allowing the manufacturer to specify the maximum length of straight vent duct to be used.  This typically can range from 15 to 90 feet.  This duct length is further defined by reducing the allowable length by 5 feet for every 90 degree bend and 2 ½ feet for every 45 degree bend in the duct.  For this reason, the policy should provide specific direction to unit owners of the minimum type of dryer performance allowed as well as advising the unit owner of the length of duct the dryer will be connected.  Some associations even place a placard at the duct wall connection with this information for future dryer installations.

In hiring the dryer maintenance contractor the Board should take the normal insurance precautions as when hiring any contractor, including coverage for general liability; automobile liability; workers compensation and umbrella liability coverage with key required endorsements.  These are needed to protect the association from both having to defend itself as well as pay damages as a result  of the contractor’s activities while also including additional insured endorsements; waiver of subrogation endorsement; and primary/non-contributory wording.

The contract with the maintenance contractor should specify the method of cleaning the dryer duct.  Typically the cleaning is a combination of extendable brushes and vacuum cleaning.  The scope of work should include specific clarification of disposal of duct debris both inside and outside the building.  Safety issues should be addressed, particularly regarding movement of gas-fired dryers.

Dryer vents maintenance policy can include some preventative maintenance guidance to unit owners.  Unit owners should be advised to report unusual dryer performance including longer than normal drying times or the dryer surface or clothes feeling hotter than normal.  The owners should also report their observations of the outside louver on their dryer vents not opening as much as before.  Excessive humid or burnt smells in the laundry area are all signs of blocked exhaust vent duct.  The recognition of dryer malfunctions and a good preventive maintenance policy will ensure the common safety for all.

Dryer Vents are just one aspect we inspect in our Home Owners Association Services

Read more

Spring Into A Building Maintenance Schedule

With Winter drawing to a close, your residents are eager to replace their snow shovels with tennis rackets – it’s time to think about building maintenance! Now is the time to implement an ongoing building maintenance plan that will save your association time and money for many seasons to come.

View your association as a complete network with many important pieces working together, and ensure that each system is functioning properly.  Here are 10 building maintenance tips your community can do now to keep your association in spring-ready shape:Spring Into A Building Maintenance Schedule for Your HOA

Drainage pathways. Clearing out your drains on a regular basis will ensure they are free of debris when spring rolls around. Spring months are notorious for high quantities of rain no matter where you live!  Avoid the potential of blocked drainage systems by habitually cleaning them every other month.

Gutter and downspout repairs. Cleaning gutters is never an easy task but it’s a necessary one with spring rainfall! Try reaching into the gutter with a pair of large tongs to dig out leaves; placing a garden hose and turning on the water full-blast also works (but watch out below!).  If the gutters are dry, and the roofs are walkable, leaf blowers make fast work of any debris in the gutters.

While you’re on the ladder, inspect all spikes, straps, and clips to ensure that they are securely fastened.

Close the foundation vent covers until summer. In the Midwest and Southern states, foundation vent covers are often left open during the summer months to allow for ventilation and airflow. However, in the winter and spring, the vent covers should be closed to prevent the warm inside air from leaking out. Closing your vent covers during the winter will save on energy and heating costs.

If you have a basement, check your sump pump regularly to ensure its operation throughout the rainy season. Water run off can create an overload of moisture that your sump pump may not be able to handle. Perform monthly inspections of the pump by opening the sump pit’s cover to clear any debris out of the bottom of the pit.

Replace snow stakes. It’s a common mistake to replace the snow stakes only once a year, usually at the beginning of winter. The stakes can be the first thing to be damaged after a heavy snowfall, particularly if the payloader knocks it over!

Do not remove snow from roof. Snow removal can be the cause of more damage than the actual snowfall itself. Most buildings are designed to handle snow, and it is very rare that even a large storm will dump enough snow to cause damage that will seriously harm your homes’ roofs. Let the snow melt naturally with Spring’s rain and warmer temperatures.

Landscaping plans. For associations in more temperate climates, the landscaping can often take a hit during the cooler months. Recover quickly by bringing in your local specialist and discussing the various shrubs and flowers that will need to be planted in spring.

Sendout paint bids for summer work. The major advantage to getting your bid requests out early is the extra time and accessibility your vendors are likely to have. Outside work requests often drop during cold weather, and getting a head start will ensure your association is at the top of their list during the summer rush!

Security enhancements. Now is the ideal time for associations to make the security enhancements they’ve been thinking about all winter. Security fencing and an alarm system are two timely projects for the post-winter months.

Replace smoke detector batteries. The batteries in all smoke and carbon monoxide detectors should be changed at least twice a year. The changing seasons are the perfect reminder to replace all batteries throughout the association.

Many maintenance projects have a double bonus – they will improve the appearance of your association while preventing costly repairs or replacements down the road. By undertaking some maintenance tasks now, you can lessen the costs that many associations rack up in the rush to recover from winter.

From the HOA Leader site, here’s a HOA Maintenance Checklist.   Criterium-Hardy provides comprehensive HOA services, contact us to find out how we can help!

Read more