Home Maintenance

Vinyl Siding – or Not

Vinyl Siding ProblemsPerhaps you are on the Building Committee which has been charged by the Board to recommend a replacement siding material for your 35 year old condo. Perhaps you are a property manager whose in-basket is filled with unit owner complaints about vinyl clapboard siding problems in the new condo complex. Whatever the vinyl façade issue is, the future solutions may surprise you.

Vinyl siding materials are everywhere. It is probably the most common façade material in all its forms used on condominiums across the nation, and for good reason. It is quick to install; it is relatively inexpensive; and has an estimated useful life of over 40 years. Most of its negatives are well understood: it can crack or break in the winter time from hail or your grandkids hockey pucks; it can make noise when it’s windy or too hot; colors fade or become chalky over time; and frequent cleaning is required. However, these may not be the issues you may need to face with the current vinyl siding problems.

Solar Attack

This problem can fall in the unintended consequences category. With the issuance of the new building energy codes and the drive to reduce our heating costs and carbon footprint, we are melting our vinyl siding. This is happening due to the installation of the new low-E, highly insulated glass windows being installed in both new buildings and replacement windows.

The thermal layers and reflective properties of these high-tech windows cause sun rays to bounce off and reflect onto vinyl siding causing the siding to buckle; warp; or melt. These new window surfaces act like magnifying glasses concentrating the solar energy on a vinyl surface that cannot tolerate heat over 150 degrees Fahrenheit. This condition can occur when a window on the south elevation of the building is near a right angle corner wall covered in vinyl siding. It can even occur when a new commercial building is built across the street and its new glass wall façade faces the sun and reflects across the street to your vinyl sided property.

So what are you to do? This problem was rare in the past but now solar damage is occurring with increasing frequency due to the drive to install low-E windows. The Vinyl Siding Institute suggests placing awning or shades over the windows and even changing the landscaping to create shade trees to block the light. Some vinyl siding manufacturers are addressing this type of solar damage by adding a ‘thermal diffusion agent’ to the vinyl mix at the factory to help reflect and resist the heat build-up.

Manufacturers are also responding to the problem with vinyl siding by excluding solar refection or melt damage from their warranties. Their warranties always excluded damage from heat sources such as gas grills placed too close to the exterior wall, but now damage from reflective windows is recognized so it would be wise to read the fine print before selecting a siding brand.

Color Fading

This increasing problem is a sub-set of the solar melting problem. Whether it be due to window reflective energy; climate change; or changes in manufacturing, this color fading complaint is becoming more prevalent. In the past, color fade was protected with a lifetime warranty by the manufacturer. Color fade was measured by a maximum of a Delta E of 4 Hunter units in accordance with ASTM standard D2244.

In the past, this warranty issue would be handled by a siding replacement policy. Now, some manufacturers are offering a ‘restore’ process instead of replacement. The ‘restore’ process would allow the manufacturer to paint the siding with an acrylic paint often applied by specialist painting contractors. This restore process comes with a 10-year warranty, down from the prior ‘limited-lifetime’ color warranty. Here again, read the fine print before signing the contract.

Installation

Vinyl siding may be quick to install, but it is not easy, if it is done right. Vinyl siding has an integral vinyl tab at the top in which an oval hole is punched at set intervals along its length to allow a nail to be driven through this hole and into the sheathing. Sounds simple, but it is not. The manufacturer specification requires the installer to drive the nail head within 1/32th of the vapor barrier/ sheathing surface so as not to bind the thermal movement of the siding.

Keep in mind the fasteners are being driven by an adjustable nail gun requiring a level of skill to properly set the nails in each slot hole without touching the vinyl. This accuracy requirement, coupled with today’s reduced numbers of skilled construction personnel, makes this a quality control challenge. If fastener binding does occur, the siding will not properly move with thermal expansion and buckling will soon appear on the surface.

So the answer to today’s vinyl siding problem is: do your research. Read the manufacturer’s specifications and warranties; ensure your contractor is committed to good supervision of the installation of this important building envelope element; and finally, follow up with your own quality verification program, either through your building committee or project engineer. The siding is only as good as it is installed.

Read more

Basement Waterproofing – How do you keep water out of a basement?

Maintain proper drainage

Basement Waterproofing - How Do You Keep Water Out of a Basement

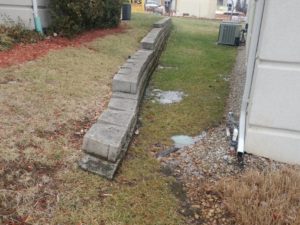
A cost effective approach to basement waterproofing is to maintain with perimeter surface drainage conditions.  The importance of proper drainage and landscaping (mature trees) around a foundation cannot be over emphasized.  Poor drainage around the foundation is the most common cause of foundation problems and basement moisture problems.  Drainage and moisture control around the home include proper ground slopes away from the foundation.  It also includes keeping your gutters clean and the downspouts functional.  Not doing so, allows the water from the roof to overflow the gutters.  This water then runs along the foundation and in turn can cause basement seepage or foundation movement.

New Construction Basement Waterproofing

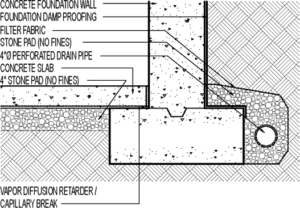
In new construction, cast-in-place concrete foundations are more resistant to water penetration than concrete block. Bituminous waterproofing should be used, at a minimum, to seal the outside of any foundation wall, however. An effective perimeter drain system should be installed to collect water from around the foundation and under the slab.

The National Association of Home Builder’s booklet on dry basements entitled, “Basement Water Leakage – Causes, Prevention, and Correction,” recommends perimeter drains on the inside and outside of the foundation. These drains should either flow downward to a gravity outlet (natural drainage) or to a sump where the water can be discharged with a sump pump.

A building built in a wet site should take advantage of additional waterproofing; a membrane system. One example of a membrane system consists of multiple layers of impervious material applied in a hot tar mopped system to the outside of the foundation. Special attention should be paid to the joint between the wall and the footing. The concrete floor and walls (whether block or concrete) should be reinforced to minimize cracking.

Existing Construction Basement Waterproofing

A water problem in an existing basement can only effectively be dealt with by:

  • rewaterproofing the outside of the foundation walls and/or
  • upgrading the exterior foundation drainage system

Both approaches require excavation around the outside of the foundation.

There are alternatives which will intercept the water using a channel-like system around the interior of the foundation wall to collect and guide the water into a sump and discharge it using a sump pump. These systems do not correct the water problem but they do control the water once it has entered the basement in a way that minimizes problems related to water entry. Such systems, while dealing more with the symptom than the cause, are typically less expensive because they can be accomplished from the inside.

Ultimately, when dealing with a basement water problem, the tried and true conventional methods working from the outside are still the most reliable.

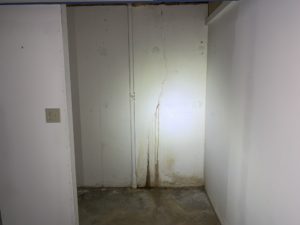
Basement waterproofing and existing building, or rewaterproofing, the outside of a basement wall requires excavation to the full depth of the wall, careful cleaning of the wall surface and proper application of bituminous waterproofing. A multi-layered membrane system should be used if the surrounding water conditions are severe. At the same time, a perimeter drain system should be installed, similar to the recommendations noted above for a new foundation. If there are cracks in a wall, the cracks should be chipped out to form a V-groove along the length of the crack approximately one inch deep. The V-groove should then be sealed with a good quality epoxy or silicone caulking, filled with mortar and covered with bituminous waterproofing.

Epoxy injection

An effective, but sometimes expensive alternative, is epoxy injection into the crack. This can be done from the inside. The epoxy bonds with the concrete and creates a somewhat permanent seal against water penetration. The limitations to this system are cost and effectiveness, depending on the size of the crack. The smaller the crack, the less likely it is that full penetration injection is possible. However, before undertaking expensive excavation around the outside of a foundation, you may want to get proposals from local epoxy companies to compare the cost and potential effectiveness.

Basement water is controllable but there is no easy answer. Only the more complex and sometimes expensive approaches are truly reliable.

Peaceful Coexistence

Peaceful coexistence is sometimes an appropriate resolution to a basement water problem. While keeping water out of a basement may seem ideal, there are risks. Preventing water from entering an older stone or concrete block foundation can cause water to accumulate on the outside of the foundation walls increasing water pressure on the walls themselves. The result can and has been total failure of the foundation wall. Where the construction of the foundation wall is marginal or questionable, the better approach to water control is to permit the water to enter, collect it into an interior drainage system, guide it to a sump and pump it away.

Check out our Residential Services to learn more about how we can help!

Read more

Spring Into A Building Maintenance Schedule

With Winter drawing to a close, your residents are eager to replace their snow shovels with tennis rackets – it’s time to think about building maintenance! Now is the time to implement an ongoing building maintenance plan that will save your association time and money for many seasons to come.

View your association as a complete network with many important pieces working together, and ensure that each system is functioning properly.  Here are 10 building maintenance tips your community can do now to keep your association in spring-ready shape:Spring Into A Building Maintenance Schedule for Your HOA

Drainage pathways. Clearing out your drains on a regular basis will ensure they are free of debris when spring rolls around. Spring months are notorious for high quantities of rain no matter where you live!  Avoid the potential of blocked drainage systems by habitually cleaning them every other month.

Gutter and downspout repairs. Cleaning gutters is never an easy task but it’s a necessary one with spring rainfall! Try reaching into the gutter with a pair of large tongs to dig out leaves; placing a garden hose and turning on the water full-blast also works (but watch out below!).  If the gutters are dry, and the roofs are walkable, leaf blowers make fast work of any debris in the gutters.

While you’re on the ladder, inspect all spikes, straps, and clips to ensure that they are securely fastened.

Close the foundation vent covers until summer. In the Midwest and Southern states, foundation vent covers are often left open during the summer months to allow for ventilation and airflow. However, in the winter and spring, the vent covers should be closed to prevent the warm inside air from leaking out. Closing your vent covers during the winter will save on energy and heating costs.

If you have a basement, check your sump pump regularly to ensure its operation throughout the rainy season. Water run off can create an overload of moisture that your sump pump may not be able to handle. Perform monthly inspections of the pump by opening the sump pit’s cover to clear any debris out of the bottom of the pit.

Replace snow stakes. It’s a common mistake to replace the snow stakes only once a year, usually at the beginning of winter. The stakes can be the first thing to be damaged after a heavy snowfall, particularly if the payloader knocks it over!

Do not remove snow from roof. Snow removal can be the cause of more damage than the actual snowfall itself. Most buildings are designed to handle snow, and it is very rare that even a large storm will dump enough snow to cause damage that will seriously harm your homes’ roofs. Let the snow melt naturally with Spring’s rain and warmer temperatures.

Landscaping plans. For associations in more temperate climates, the landscaping can often take a hit during the cooler months. Recover quickly by bringing in your local specialist and discussing the various shrubs and flowers that will need to be planted in spring.

Sendout paint bids for summer work. The major advantage to getting your bid requests out early is the extra time and accessibility your vendors are likely to have. Outside work requests often drop during cold weather, and getting a head start will ensure your association is at the top of their list during the summer rush!

Security enhancements. Now is the ideal time for associations to make the security enhancements they’ve been thinking about all winter. Security fencing and an alarm system are two timely projects for the post-winter months.

Replace smoke detector batteries. The batteries in all smoke and carbon monoxide detectors should be changed at least twice a year. The changing seasons are the perfect reminder to replace all batteries throughout the association.

Many maintenance projects have a double bonus – they will improve the appearance of your association while preventing costly repairs or replacements down the road. By undertaking some maintenance tasks now, you can lessen the costs that many associations rack up in the rush to recover from winter.

From the HOA Leader site, here’s a HOA Maintenance Checklist.   Criterium-Hardy provides comprehensive HOA services, contact us to find out how we can help!

Read more